OLEDモジュールをラズパイ4+Node.js環境で使うための覚え書。
作業環境
- Rapberry pi 4
- Node.js v 17.x
- 2C OLEDモジュール(128X64 SSD1306 4ピン)
作業手順
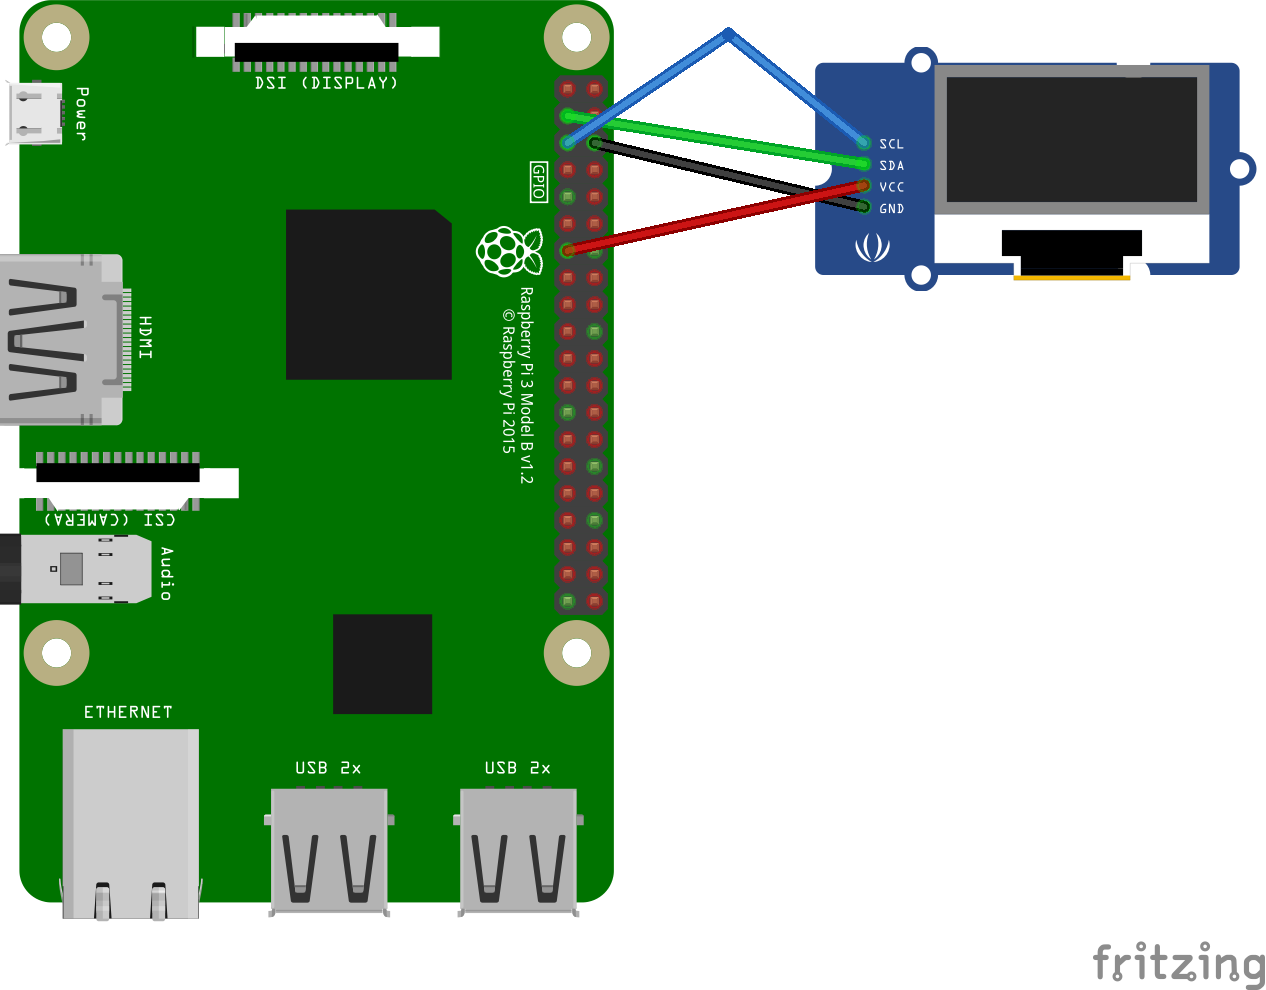
1.OLEDディプレイを繋ぐ
2.Config画面を開いて、I2Cデバイスとの通信を有効化
$ sudo raspi-config
Interfacing Options -> P5 I2C -> YES
3.ラズパイをリブート
$ sudo reboot
4.I2Cデバイスのアドレスを確認
$ i2cdetect -y 1

     0  1  2  3  4  5  6  7  8  9  a  b  c  d  e  f
00:          -- -- -- -- -- -- -- -- -- -- -- -- --
10: -- -- -- -- -- -- -- -- -- -- -- -- -- -- -- --
20: -- -- -- -- -- -- -- -- -- -- -- -- -- -- -- --
30: -- -- -- -- -- -- -- -- -- -- -- -- 3c -- -- --
40: -- -- -- -- -- -- -- -- -- -- -- -- -- -- -- --
50: -- -- -- -- -- -- -- -- -- -- -- -- -- -- -- --
60: -- -- -- -- -- -- -- -- -- -- -- -- -- -- -- --
70: -- -- -- -- -- -- -- --
5.モジュールをインストール
$ npm install raspi-io
$ npm install johnny-five
$ npm install oled-js
$ npm install pngparse png-to-lcd oled-font-5x7
6.スクリプトを作成
const five = require('johnny-five');
const raspi = require('raspi-io').RaspiIO;
const board = new five.Board({
	io: new raspi()
});

const Oled = require('oled-js');
const font = require('oled-font-5x7');

board.on('ready',() => {
	console.log('Connected to OLED, ready.');
	const opts = {
		width: 128,
	    height: 64,
	    address: 0x3C
	};
	oled = new Oled(board, five, opts);
	oled.clearDisplay();
	oled.setCursor(1, 1);
	oled.writeString(font, 1,"Hello World!", 1, true, 2);
	oled.update();
});
7.スクリプトを実行
$ node ./index.js
おしまい!